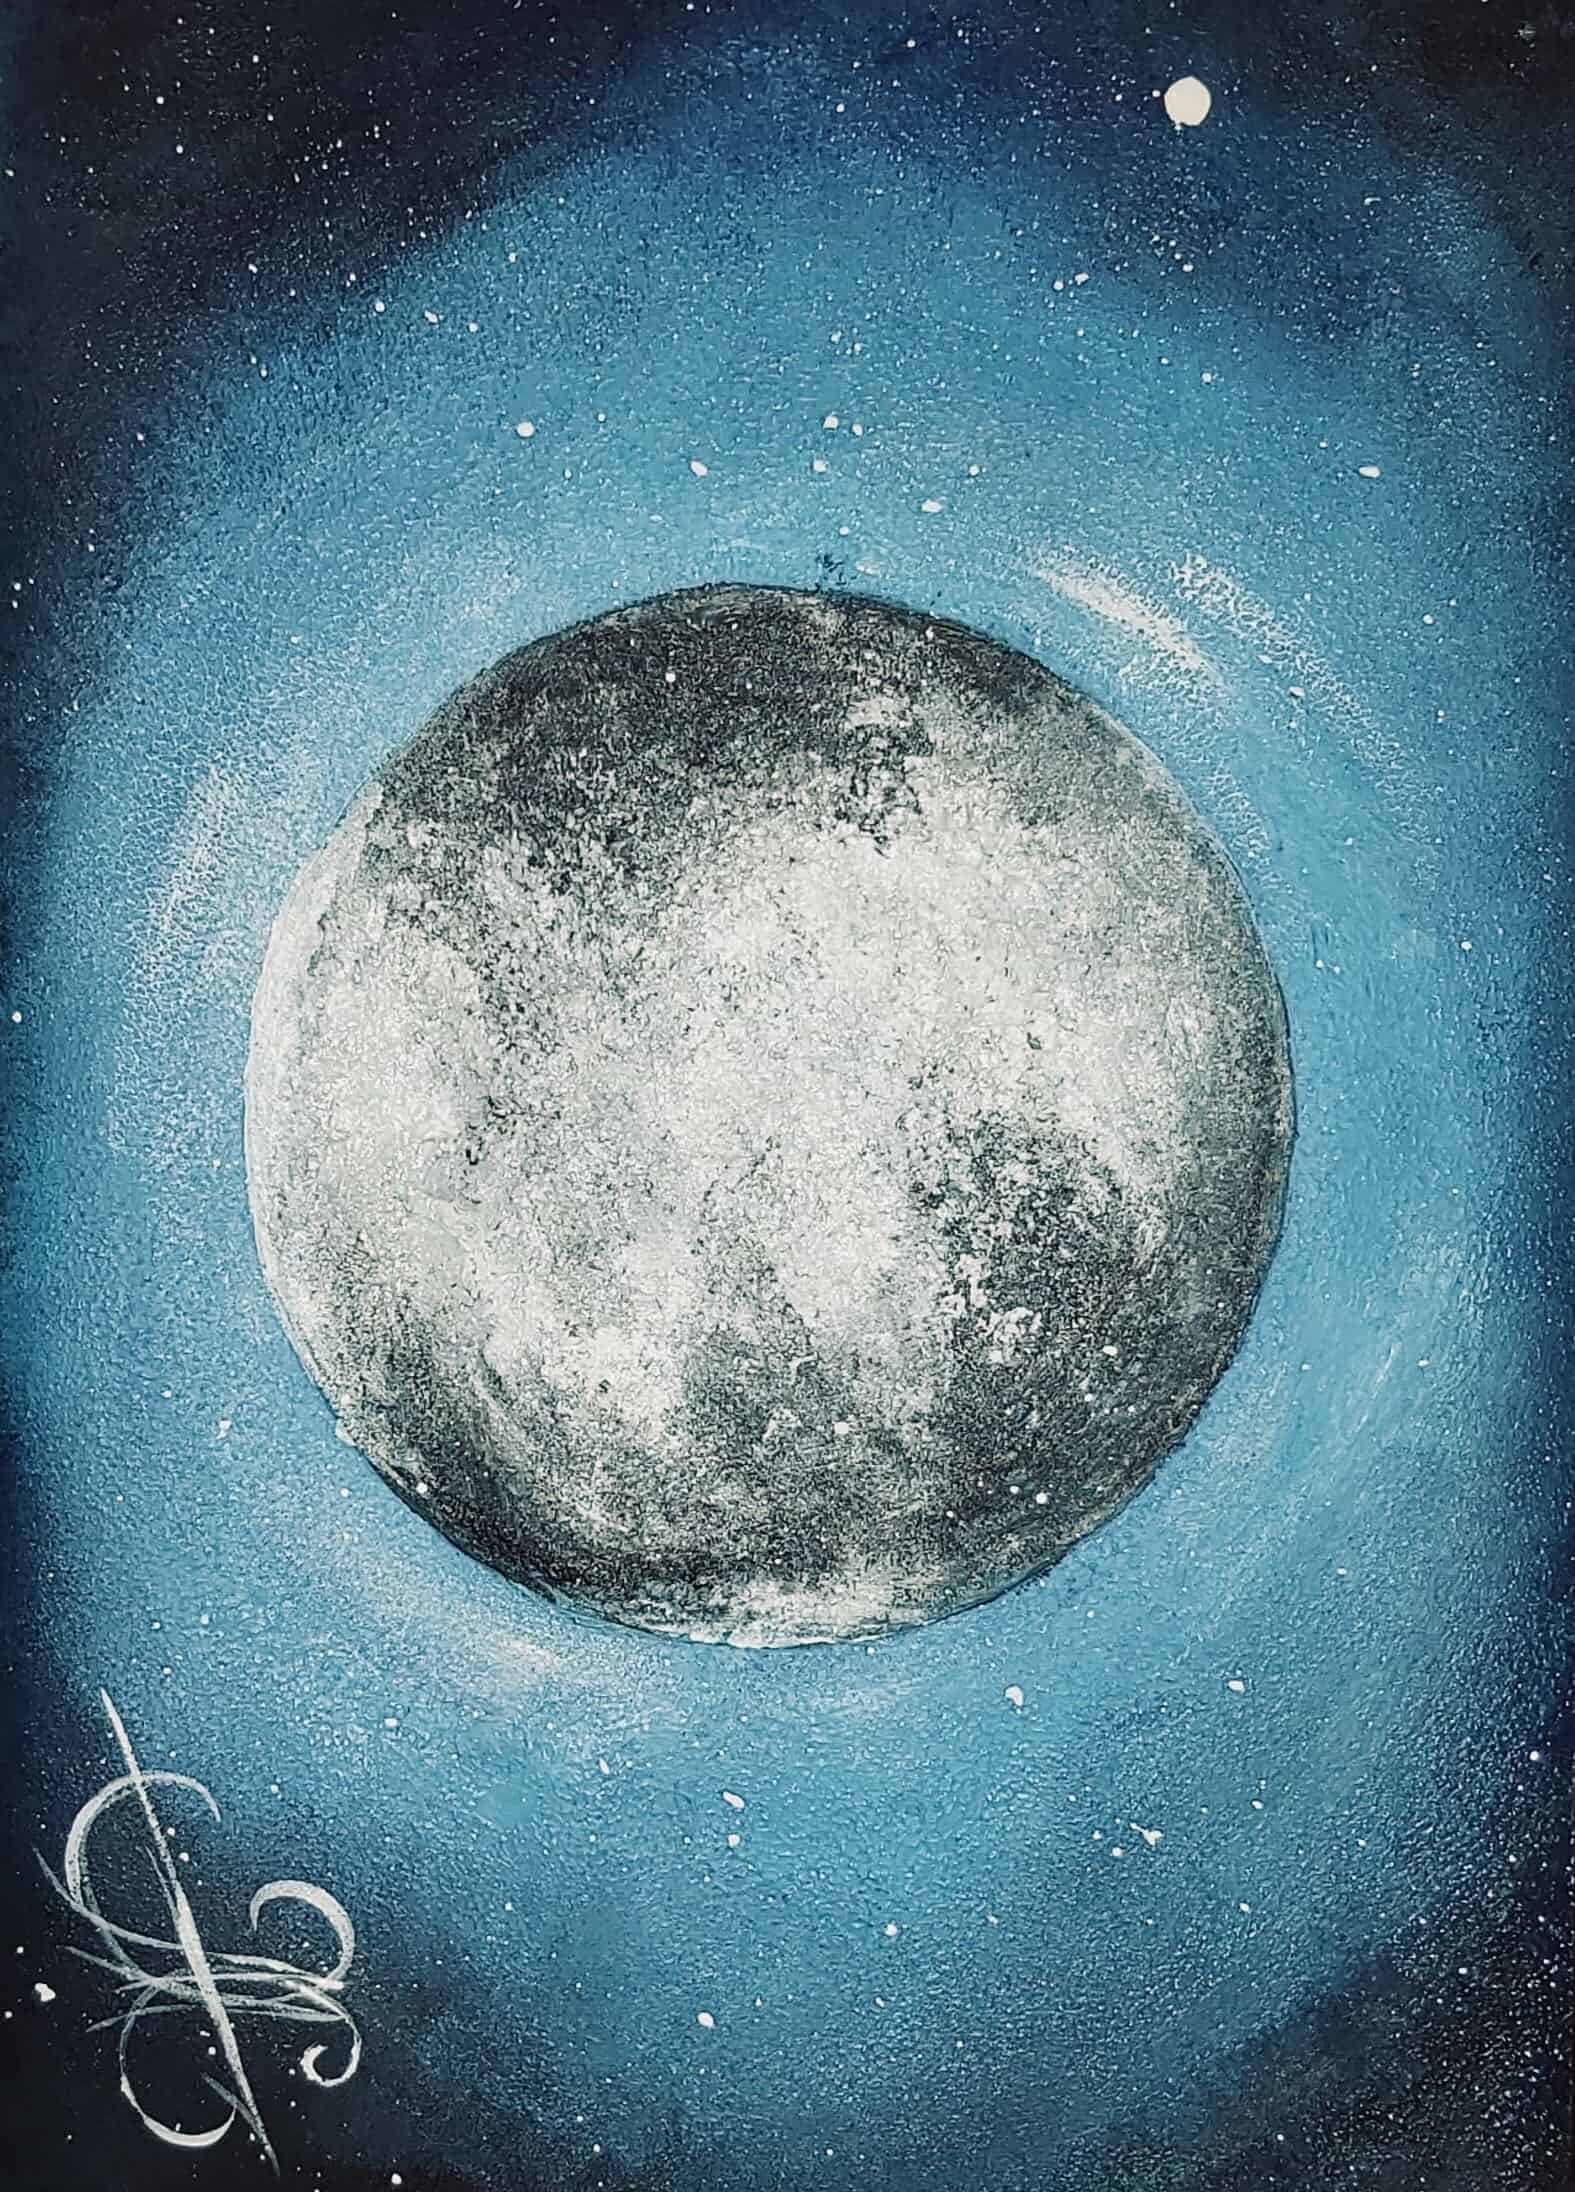
Spend a quarantine time creatively together with Foundation Ukraine and the project “Integrational program Ruska 46A II”. We are glad to present you with a step-by-step guide on how to decorate your home and draw a moon in a starry sky by yourself, not even worse than by professional artists.
This month we have prepared for you something interesting and non-typical: the new format of drawing master class for children and adults – DIY or Make it by yourself. In this article, you will find a step-by-step guide on how to draw the shining moon in the starry sky in 30 minutes. Inspiration for creating such a guideline was one of our previous masterclasses which were presented in CUKR in the framework of the project of Foundation Ukraine “Integrational project Ruska 46A II” co-financed by the Wroclaw municipality.
Make it by yourself with the Integrational program Ruska 46A II
The project “Ruska 46A II” is focused on creating more possibilities for integration, learning and comprehensive self-development of migrants and new citizens of the city of Wroclaw. In the framework of this initiative, there are held Informational consultations in the Infopoint in CUKR, culinary masterclasses, drawing lessons and even yoga training. More info about the project, you can find in our article the Integrational program for everyone – Ruska 46A II.
How to depict the mystery of the satellite of the Earth on the paper
So, let’s not spin out! We will reveal to you a secret of how the mysteriousness, charm and elegance of our immemorial satellite of the Earth can be easily depicted on the paper. For creating this we need: a creative mood, comfortable working place, atmospheric music in the background and needed materials to work presented below:
- The piece of black paper (The size doesn’t matter – it depends on your wishes. You can also use a white paper, but then it will take more time to draw a picture).
- Four colors of acrylic paints: white, blue, dark blue and black.
- Two flat brushes with synthetic bristles (the small one with a width of 1,5 cm for contour and the big one with a width of 3-4 cm for drops).
- Cut the small piece of sponge for dishes and a piece of aluminum foil.
- Something round for creating a stencil (you can use a round plate or a saucer).
- A piece of white chalk or a white pencil, and a graphite pencil.
- A glass of water for cleaning the brushes and a paint palette.

Notice that before starting your creative activity, we strongly recommend you to cover your working place with an oilcloth or paper – during the process of drawing, drops of paints will be all over that place.
7 simple steps that will help you to become a true artist
If you have everything prepared, we can start!
Step 1. Put the piece of black paper in front of you. In the very center of the paper place our round thing for the stencil and encircle it with the white chalk. Ready? Great! Now we can start playing with colors.

Step 2. In the very center squeeze out the circle of white paint, then 3cm from the white round encircle that round with the blue paint and repeat such actions with the dark blue paint. Don’t worry about going beyond the stencil. The more paint will be beyond the stencil, the more lightning will have our moon. In the corners add some black paint and smudge the paint with the sponge starting from the center for creating the effect of the thick structure. It is important to move from the lightest paint to the darkest one and not moving back. This strategy will rid you of some unneeded stains and make it more realistic.

Step 3. Next, we need to create the effect of the starry sky. For that, we will use white paint and a big brush. Take some paint with the wet brush and on the distance of 50 cm under the paper, slide your finger over the brush, so that the paint will fly all over the paper. Repeat such actions until the whole paper will be full of white drops of different sizes and there will be created the effect of the truly starry sky.

Step 4. Take a coffee break and wait until our paints on the paper are dry (in around 5 minutes). After that, put your round plate on the place where you placed the moon on the very beginning and lightly encircle it with the graphite pencil.

Step 5. Now we can start making a structure of the ground for the satellite of the Earth. We need to dent it in the way that it will be easy for you to paint on it. Notice that foil must not be very thick. Then we start creating the ground of the moon using black and white paints one by one. Color should be painted evenly creating the texture which imitates brush strokes on the paper. Add more white color on the right side, and a more dark color on the left. In this way, we’ll give brightness and shape to the painting.

Step 6. We are almost in the final step. The one thing that’s left is to add more tidiness to the picture. Take the small brush and carefully draw a clear contour for our moon in needed places. Also, if it is needed, add some white paint with the dried brush imitating moonlight.

Step 7. Congratulations! You just have to place your artist’s signature, wait until the painting is dry and decorate with it your home! We believe you made it great!

We are eagerly waiting to see your painting!
Thank you for your attention and we are eagerly waiting to see pictures of your piece of art on our Facebook page https://www.facebook.com/CUKR.Wroclaw/. Follow our page to get to know about other useful information and new events from Foundation Ukraine.
Also, follow our Instagram page: https://www.instagram.com/cukr.wroclaw/ and subscribe to our YouTube channel: https://www.youtube.com/channel/UCS9Afcq5gYybQwMTOvfeGXg, where we post a lot of free practical information for migrants and keep ongoing contact with our followers. See you at CUKR!
The project “Integrational program Ruska 46A” is co-financed by the Wroclaw municipality.